

I recently promised you some background on my struggles with the base of my diorama My Worst Nightmare.
Therefore: it’s all about the base
There is no higher purpose to this blog post other than that I hope that you can learn from my mistakes. It may save you some valuable bench time for your current or future projects.
Well, the title My Worst Nightmare is definitely applicable in many ways, but the base of this project has cost me some serious blood, sweat and tears, metaphorically anyway.
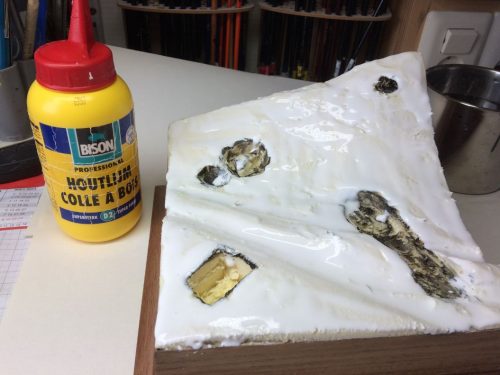
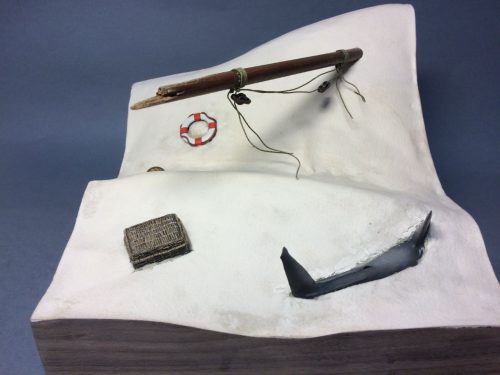
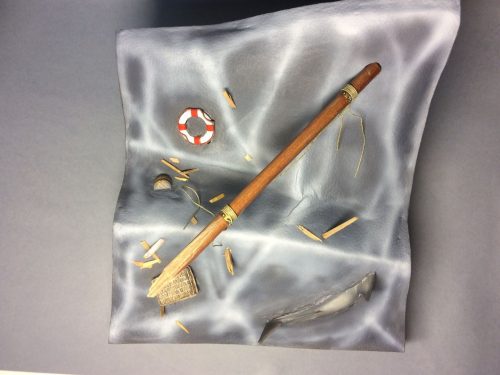
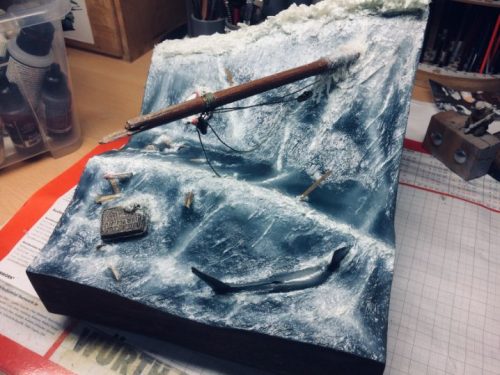
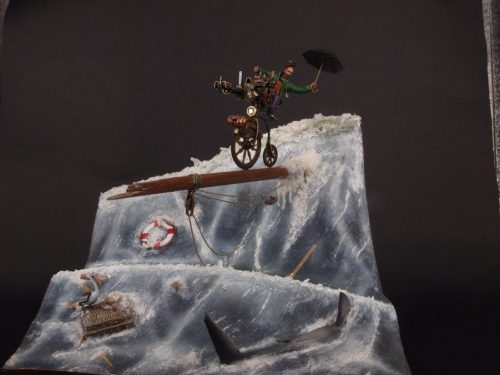
I have made various versions of the base and I would like to go through three of them in this blog. In the next three images you can see the version that was about to become the final one until something happened on the way to heaven. Actually the base was not the only part of this dio that went through various versions, the mast and the shark were also re-done several times. The only two elements to come out in one go were, surprisingly, the bicycle and the figure. The devil is in the details and often not in the obvious. You can take my word for that.
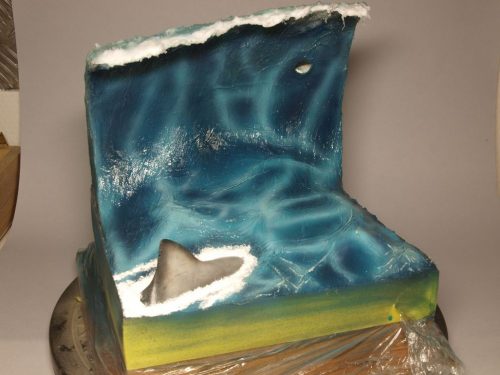
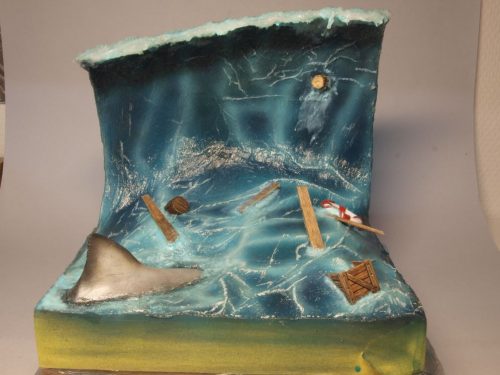
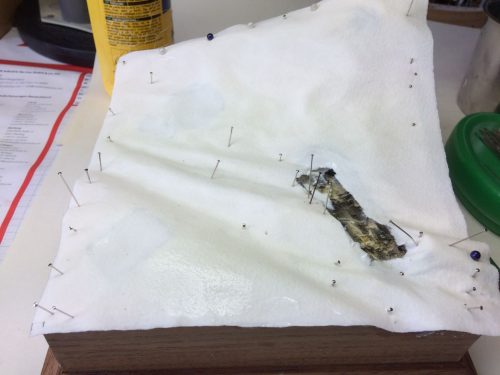
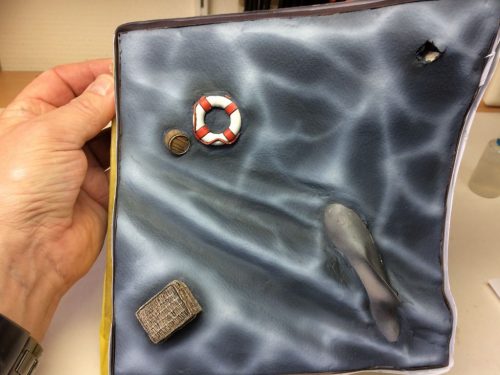
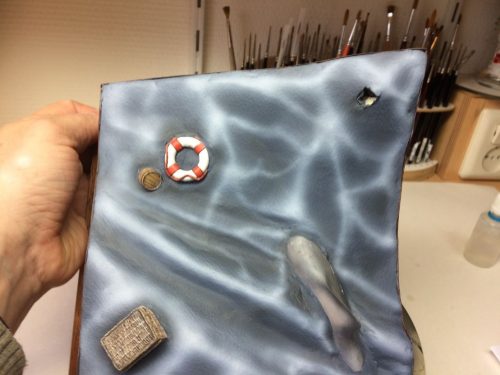
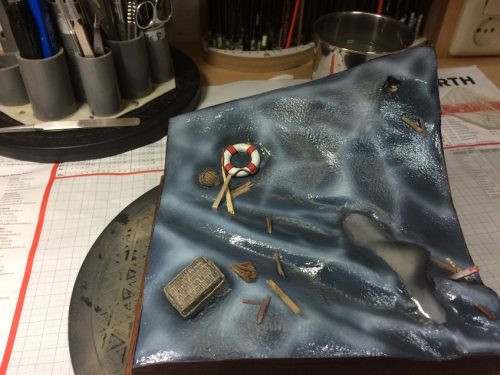
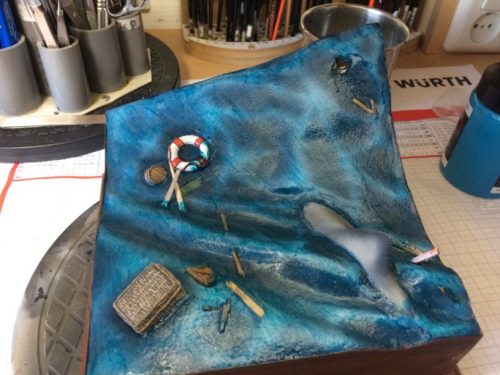
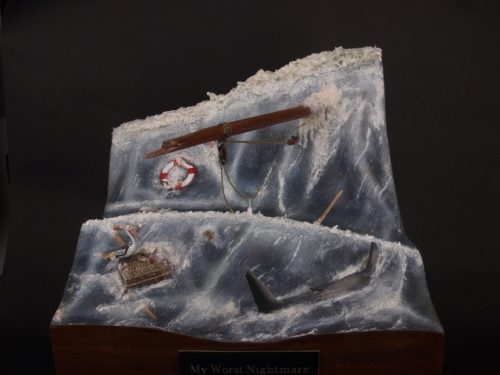
Pic 1 shows the base with the shark embedded. Pic 2 shows the freshly applied acrylic gel, still opaque, and on the third one the gel has turned translucent….and the remainder of the broken off mast. Bummer!
Can’t really remember what happened exactly, but I guess that a clumsy movement while painting or retouching details was the cause of that little unhappy accident
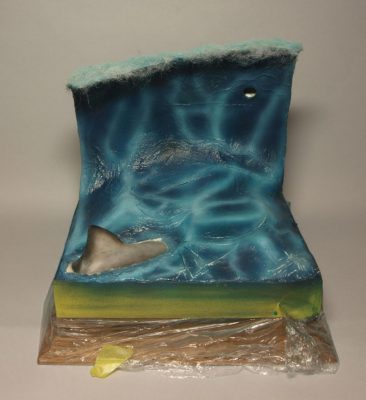
Perhaps equally important is that I didn’t like the final look of the base. The wave had become to dominantly present compared to the other elements and there were just too many small things that I didn’t like and last but not least, the composition came out not exactly the way I wanted, mainly due to the position of the shark. The guy on the bike was looking way from the shark. FAIL!
So, all in all, it was back the drawing board.
I decided to make a less dominant wave this time. Less is more, as they say and it’s definitely true. The suggestion of something can be stronger than actually showing it in full. A new base was shaped from HD Styrodur (the yellow stuff!), and the main elements were added.
Next the base was covered with waterproof (water colour) paper. Besides the advantage that this does not dissolve in water, it also has a nice texture. In hindsight that particular property was of little use in this scale, roughly 1/35th. The texture more less disappeared under many layers of a lot of things, acrylic gel mainly. The paper was shaped over the Styrodur with diluted white glue or wood adhesive:
and held in place at the edges with 6814891 pins until dry.
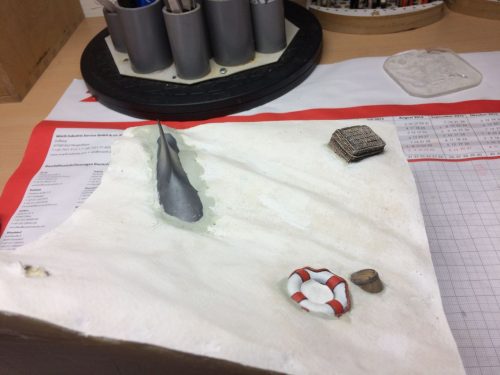
Before the fun (read: painting) started I attached the main elements to the base and filled the edges with Magic Sculpt.
Enter…the airbrush. I used my AB to paint the base with various blue and grey tones
Next, I applied a glossy coat with a product so secret that I don’t know what that was, actually. That’s a laborious way to say I forgot what I used. Best guess is that it was Johnsons Floor Polish, applied in 2-3 layers. You can also still see the texture of the water colour paper here.

And then….the magic happened. Or perhaps I should say, was supposed to happen.
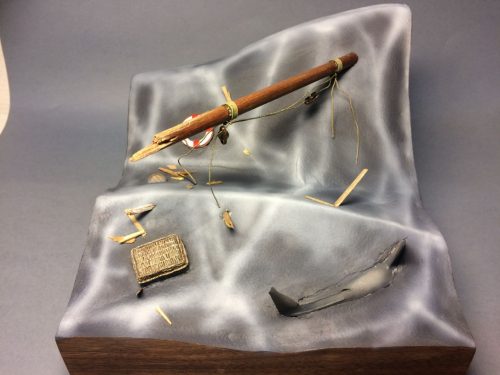
Entering stage right: Vallejo’s Water Texture Atlantico.
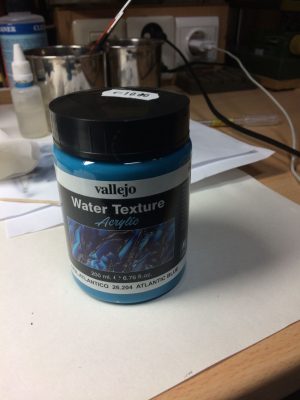
I applied this coloured acrylic gel as a start to colour the sea a bit brighter blue. As this gel becomes translucent once dry, the underlying airbrush job would still be visible.
But…..this stuff has a nasty side effect. I applied it with a brush, making sure to keep the direction of the strokes parallel and in one direction, in order to recreate the flow of the water. However, by doing this, the pigments (I suppose it has pigments to make it blue) are kind of squeezed by the bristles, basically leaving brush strokes. I checked with someone who has used this gel too, someone way more skilful than I am, and he confirmed this is actually an issue with coloured acrylic gels.
This image:
shows the result after the acrylic had dried.
Needless to say that I was ready to pull my hair out, if I’d had any 😊
So, Water Texture Atlantico exits stage left….
After long and very confronting therapy, I decided to pick up this project again. Actually , and according to the dates on the images I took, this was next day.
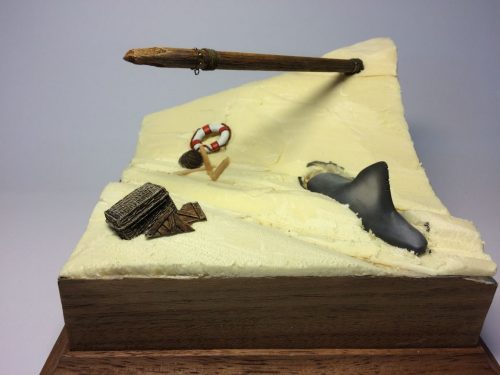
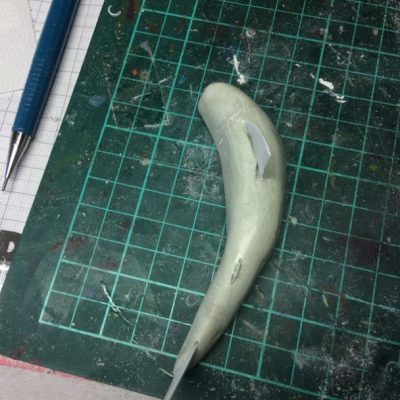
All drama aside, I decided to be a man about it and started with base numero whatever. The original shark had disappeared into the same bin as the previous base(s), and Magic Sculpt, Apoxy Sculpt, and a wee bit of Evergreen came to the rescue for another shark species.
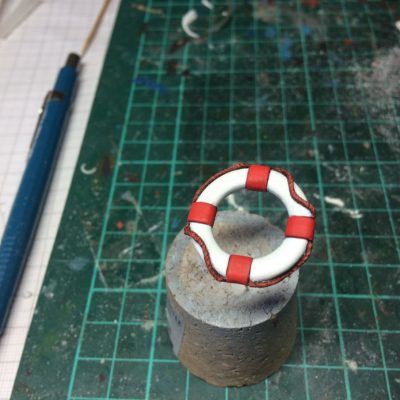
I also had to paint a new lifebuoy as the other one did not survive while being rescued from the other base.
And again, a new base was made with HD Styrodur (the yellow stuff, remember?). Cut and sanded to shape. Gaps were filled with self-hardening clay and Magic Sculpt. The larger gaps were filled with clay as it’s a helluvalot cheaper than Magic Sculpt….. in case you wonder.
I used the water colour paper again to create a smoother surface
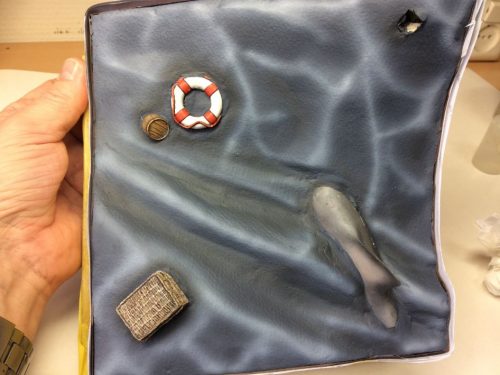
and did some happy airbrushing:
This time I covered the base with Acrylic Artists Gel Medium from the Rembrandt brand. Obviously the translucent drying type
I repeated this process and added more local layers, alternating between the same gel and Vallejo Still Water. All of this to create depth in general and more volume to certain areas where I thought that this was needed. The final layer was created with brushed on and ever so carefully and slightly tainted Still Water (to add a bit more blue to the final look). After all these layers the original texture of the paper went AWOL.

I tried to keep the blue tint of the water very moderate as I didn’t want to create a deep blue sea, because to me that would define the weather as very sunny, and if you look at the rest of the scene you will understand that a sunny atmosphere would be not very appropriate for this scene.
So what else is left to say? Well, I have no images to prove it, but trying to use two part epoxy resin for water on this kind of base is a bad idea too. Been there, done that. I tried to add thin layers of the stuff, but of course this resin is supposed to level. Trust me….it does….always.
In hindsight I could have casted the wave from resin, but perhaps I was too lazy or even more likely, I just didn’t want to spend a lot of money on mould rubber and resin. Mind you, it would have become a serious block of resin. After I finished this project I did see some very interesting and stunning projects where the waves were cast indeed. But like I said…….that was after I finished this one.
I started this project January 2015, according to the data of my pictures. I finished it four years and one month after I started it, according to the same data. The wave being the part of the project that made me hesitate time and time again to finish it and just put it aside to work on otther projects.
The moral of this story? Stop whining and just do it! 😊
Happy modelling.
Robert


0 Comments