by Robert | Aug 27, 2014 | Work In Progress
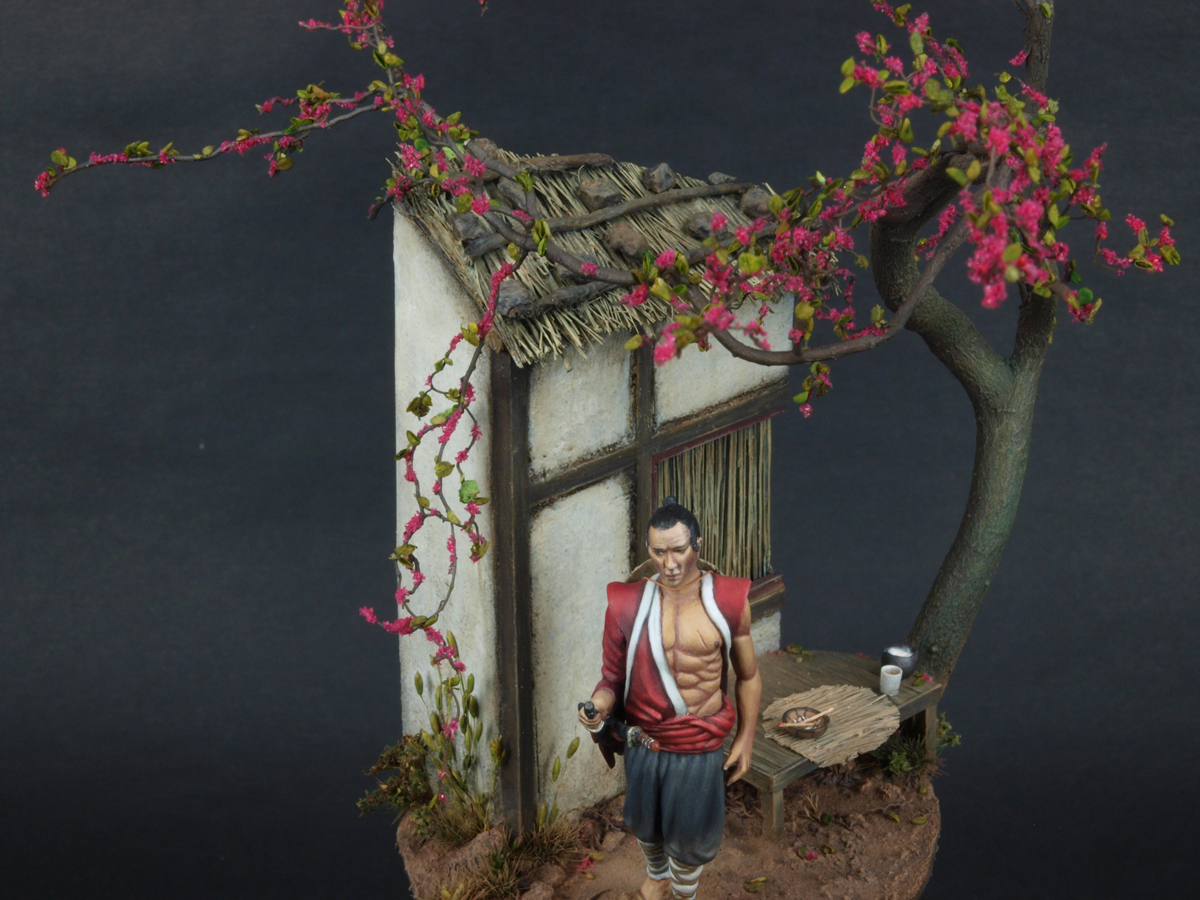
Here are some in progress pics of the Ronin project.
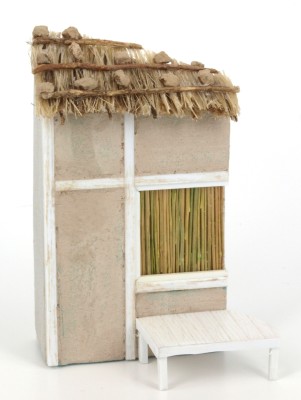
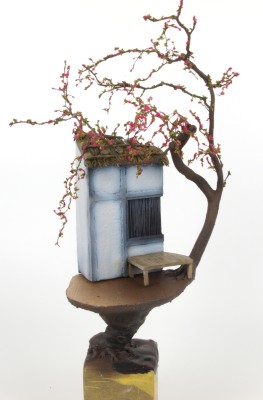
The house was made of blue HD styrofoam and Evergreen. I covered the walls with, how appropriate, wall filler and sanded it back to achieve a slightly smoother look.
The roof was fashioned from bristles from an old paint brush, and I raided my “green” box for the window covers; cutting of stems from dried “something”. No idea what, but it served the purpose.
My green box is a collection of stuff I use for my dioramas: natural and manufactured products, purchased stuff as well as all kinds of goodies I found in the garden or wherever you find useful things. Which could be everywhere you go, really.
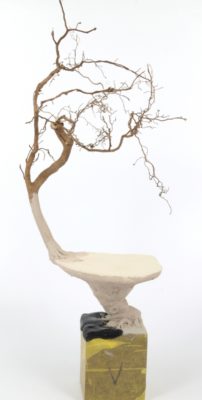
The tree is a dried root and I sculpted new roots at the bottom. I covered the sculpted area and lower part of the stem with Bark Paste from Anita Decor, a railroad brand. Kewl stuff!
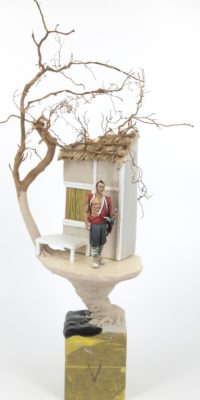
The wooden base has an interesting colour pattern and has actual cracks that inspired me to fashion the base the way I did. I sculpted the “tree” leading to the actual base from Magic Sculp, wrapped around a twisted wire armature, and let the roots drape over the edges and run into some of the crevices of the wooden base.
I wanted the blossoming tree to work as a sort of natural frame for the figure, as the figure is obviously what it’s about. The scenery is merely decoré, but effectively used to “box” the figure, so to speak. My wife and I, together with some friends, were recently invited by our friends Goetz Siepmann and Nicole Siepmann-Eppinger for a weekend of figure painting, base making and to hang out. Goetz and Nicole really inspired me by their approach of making bases for their figures. So I owe them a big thank you, as this project, simple as it may seem, has made me realize that thinking out of the box is the best thing to get you any further in this wonderful hobby.

by Robert | Feb 10, 2014 | Work In Progress
Over the past few weeks I spent some hours working on my Snow Crash diorama. My last effort to actually building something diorama-ish dates back roughly two years. And something of this size (32*42 cms surface) I can’t even recall the last time, perhaps 4-5 years ago. Working on the various elements, figures, aircraft, groundwork, planning etc. reminded me though, that building dioramas requires all the skills you’ve got.
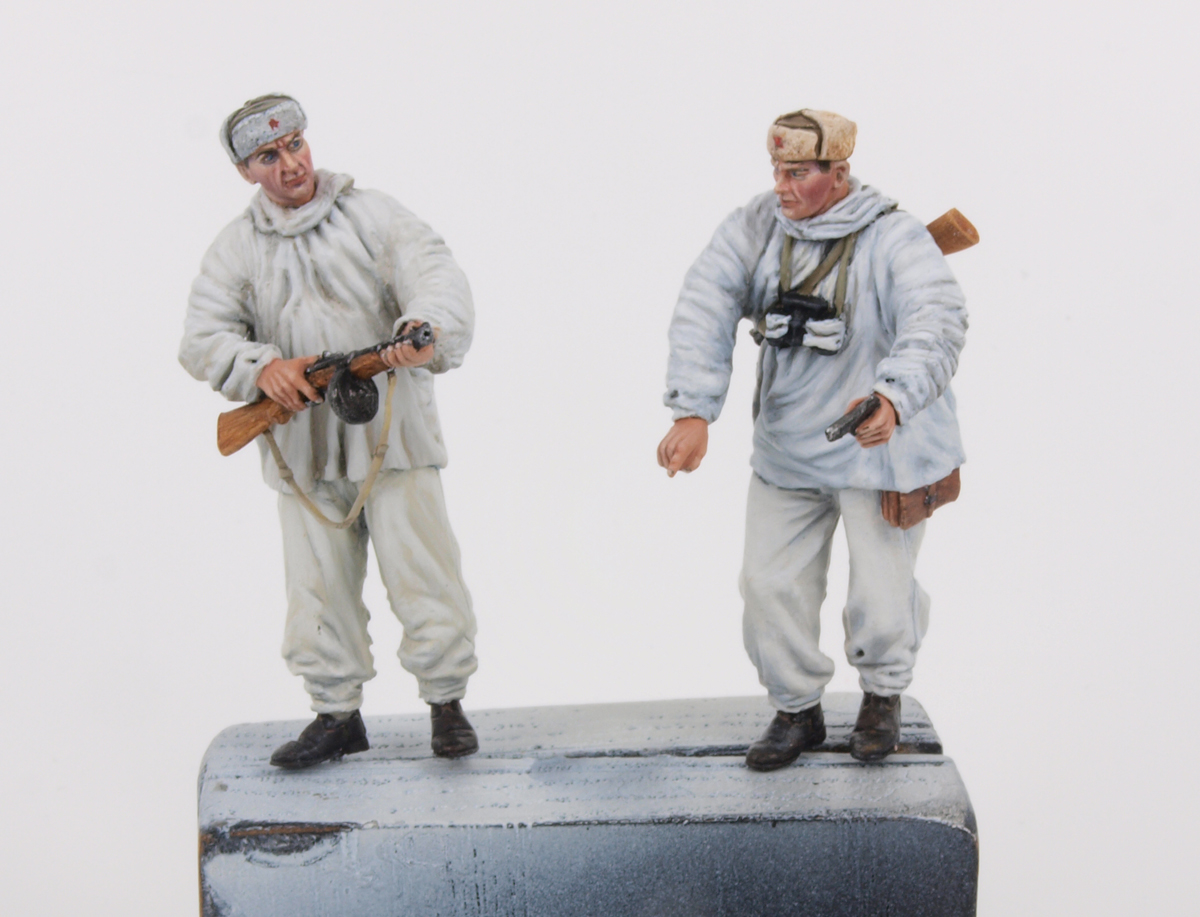
As the title already mentioned, the Aerosan crew is done, with some slight modifications to a set by the company TANK: They still require some weathering, but I’m saving that for when the diorma is nearing final completion.


There’s no question about it: modellers do need elaborate reference material and an extensive library. Here’s why:


Several steamy nights including hot carpentry and messing about with styrofoam lead to this translation of the previously shown layout:


From Balsa wood rods, bark paste, Asparegus fern leaves, 3M Spray Mount and static grass I made two fir trees and some fir tree parts (The Storch had hit into something, remember?). Here’s the green version of one of the trees….they will become white in the end:

Roughly testing the lay out of the different elements, always an exciting job as the idea comes to life:


I also started painting the Storch..finally. Pre-shading and base coating the bottom of the fuselage and wings:


One piece of advice: Masking the canopy with bare metal foils is the best thing you can do….said no modeller ever.
I applied it months ago, left it there for much too long and found last week that it was a helluva job peeling it off, finding glue residue all over the canopy. After removing all the bare metal foil, scraping it off actually, I removed the glue residue with Revel Painta Clean (don’t ask !) and then buffed it as well as I could and decided that I actually had something quite handy available and it may not come to a surprize to aircraft modellers:

Yes indeed. Alclad’s Aqua Gloss brought back the canopy to an acceptable state, after I applied several layers with the airbrush, resulting in a look that is feasible for harsh winter conditions.
A hard lesson learned here…. After taking these images I used low tack masking tape te re-mask the canopy for futher painting.


I am going for a two-tone green camouflage for my little Storch. No white wash as I need some nice contrast to all that friggin’ white stuff, ha!
So that’s all for now folks….to be continued
by Robert | Dec 3, 2013 | Work In Progress
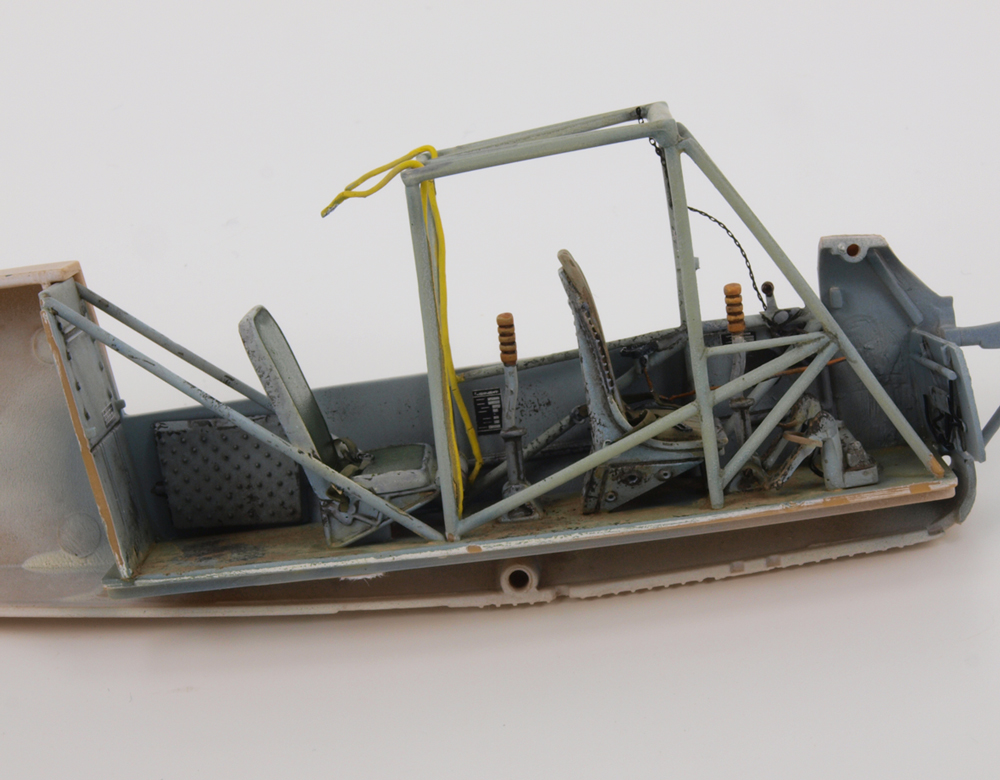
I have picked up my still nameless project again, involving an Aerosan and a Fieseler Storch in 1/35. Both kits are rather basic, the Fieseler Storch lacks a lot of interior details. In this diorama the Storch will do what it does best….crash 🙂 Or better said, it has made a rough emergency landing. This scenario will include a broken wing, broken prop blades.
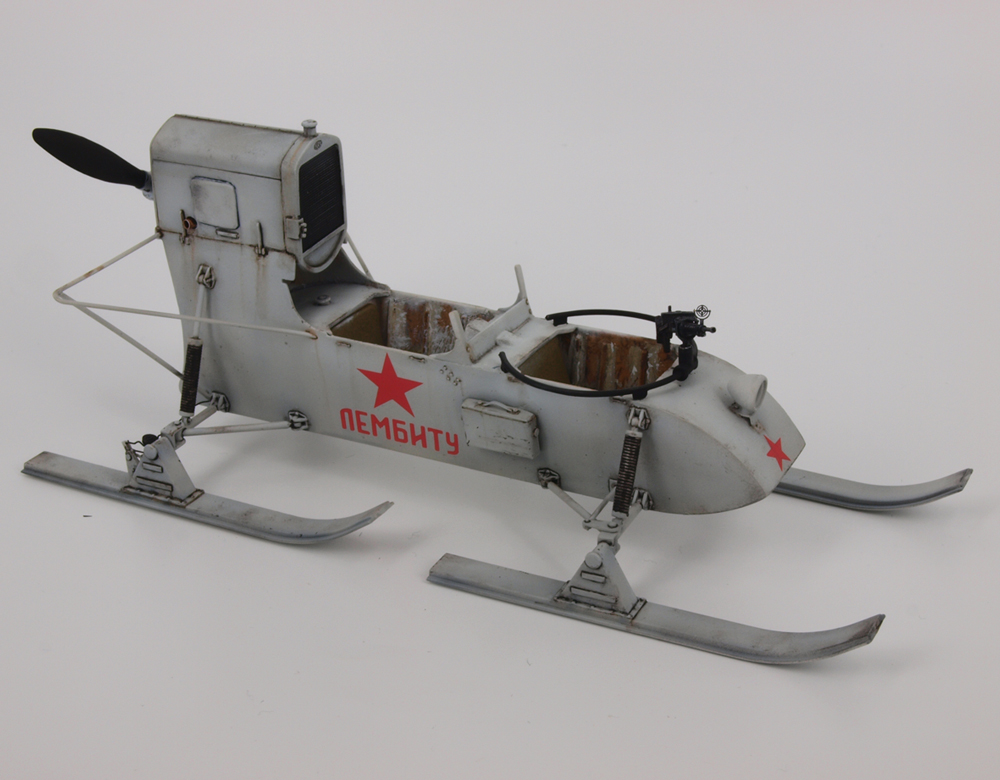
Pics of the Aerosan in progress with moderate weathering, and still some work to do:


And I have done some work on the Storch as well. Some bits to add still, including the small stuff that’s supposed to be scattered throug the cockpit
Anyway…


To be continued….
by Robert | May 21, 2013 | Work In Progress
Working on several projects, although “working” is the wrong term I’m afraid. Not much progress over the past several months. Life gets in the way, so it seems.
Anyway, the Trumpeter Aerosan in progress. Lots of missing details that had to be scratched and even more present, but wrong details , such as 4523578 bolts that were not on the actual vehicle, so these had to be sanded off.
The Aerosan will be part of a larger diorama involving lots of snow, which may not come as surprize.
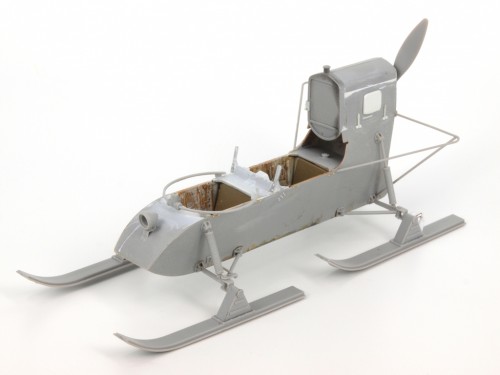
Aerosan
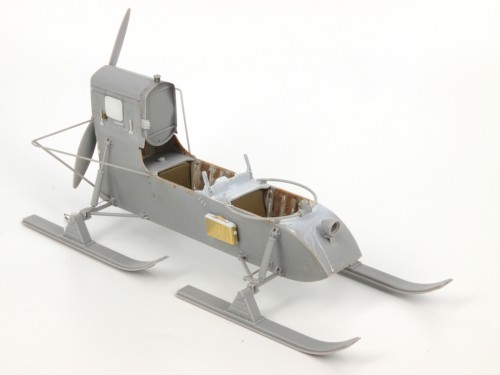
Aerosan 2
Next on the to-do list is my first shadow box entitled Stake Out, featuring the Tamiya Citroen Traction, an oldie but goodie from Verlinden with a new head (MK35). This project is turning out to be my white whale as getting it composed and boxed properly is a true challenge. But the good ol’ Shep Paine diorama book shows it’s eternal value again. Very helpful info indeed.
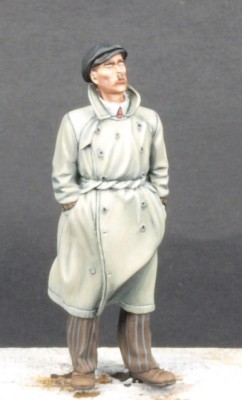
Didier
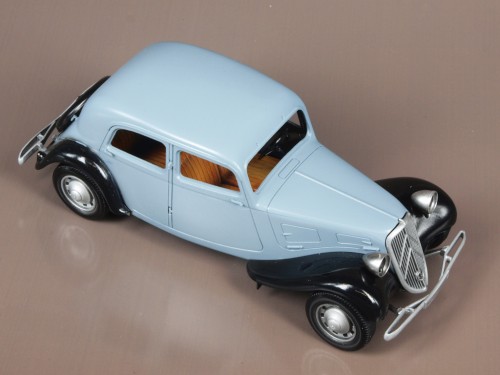
Tamiya Citroen Traction